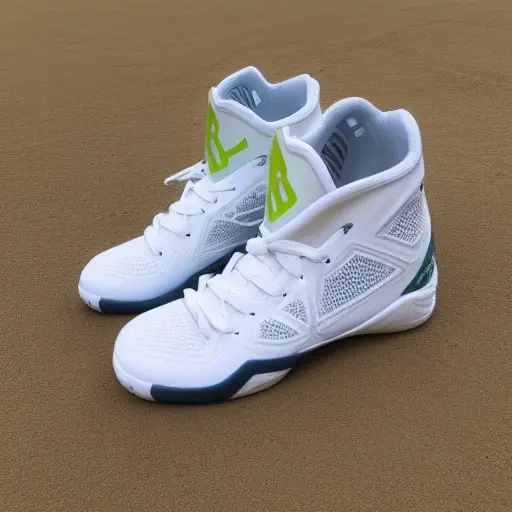
Volleyball shoes can start to smell after a while if you don’t wash them. All the sweat is accumulating in them and creates a nasty mess. It is also possible that you used the shoes outside and there is dirt on them.
All of these situations can lead to the need for a good wash for your shoes. It is often needed to do this every 2-3 months to keep your shoes clean and sparkly. This process can take a few days so make sure that you don’t do this just before an important match. Let’s discuss how you can do this step by step.
Step 1: Remove the shoelaces.
This is quite easy to do but takes some time. You can start on one side and go to the next part after this. Check if the shoelaces are still strong. If you have used them for a while, it is possible that they start to break. In this instance, it is best to replace them with other shoelaces. Sporting shoes have other laces than normal shoes so be sure to get the right ones. In most instances, it is best to buy the same color and size again.
Step 2: remove the innersole
In most instances, you can remove the sole from a shoe. It is possible to replace these as well. This keeps them fresh and offers enough support. It is quite cheap to replace them so you can do this every few months. The foam in them degrades over time so it is important to get new ones. At this point, you can also check if your shoes are damaged (for example cracks or cuts).
You can bend the shoes and see if they provide enough support and come back to their original shape. This can indicate that it might be time to replace them. Broken shoes can lead to injuries so it is something that you have to avoid at all costs. Most volleyball players have to replace their shoes every 4-6 months. Replacing your soles can also be a great idea:
Don’t try to save by delaying this as this can lead to problems such as broken shoes. You use your shoes a lot during a match or training so spend the right amount of money and attention on them. If your shoes are too dirty, you might not be allowed in the sports arena or your coach might make a remark about this. After a while shoes also lose their grip, resulting in slips and slides.
Step 3: Take a bucket and fill it with soap and water.
You can use a brush to clean the sole of the shoes if you have used them outside. Mud and dirt can be quite difficult to get off. Give it a good brush. In some instances, you might need to use an old toothbrush to get all the small grooves cleaned out as well. If the mud is still wet, you might want to place the shoes in the sun to let the mud dry. Afterward, it is easy to get this out by hitting the bottom of the shoes on a hard floor.
You can also consider using wet wipes. These are very handy as you can take a lot of them and just wipe them on your shoes. Be sure to throw them in the bin as these can’t be flushed down the toilet!

Step 4: Place them in the washing machine.
Check the washing instructions of your shoes before you do this! Some shoes can’t be placed in the washing machine or should be washed at low temperatures. Most sporting shoes can be washed at 30 degrees or less.
I prefer to hand wash and soak my shoes as a washing machine can damage them but this comes down to personal preferences. Also, check the instructions of your washing machine as shoes can bang around quite a lot. In some instances, it is better to place them in a net so that they stay together while the washing machine is turning around.
Step 5: drying your shoes.
Once the washing program is done, you can put the shoes outside to let them dry in the sun. It is important that you leave your shoes outside for a long period of time so that they get fully dry. You can consider inserting shoe trees so that your shoes retain their shape. The toe part of the shoes can start to curl up if you don’t do this. This is also the reason why you shouldn’t use the drying machine when you dry your shoes.

Step 6: Insert your laces and insoles again
This is quite easy to do. Just make sure that you use the same pattern again so that you can close your shoes well and that they are tight around your feet. You can check again if there is no damage after you have washed them so that your shoes don’t break during a match or training session. It is also possible that the shoes aren’t a lot cleaner after the wash. This can indicate that you might need to get a new pair.
New shoelaces can make your shoes look fresh again. These are not that expensive and can be a great way to upgrade your shoes.
To conclude, we can state that it is important to keep your volleyball shoes clean. This can be done by washing them. You can replace the shoelaces and insoles as well to give them a new look and feel. A lot of players don’t spend enough time maintaining their gear and this can result in broken or smelly shoes. It is often a good idea to wash or replace your shoes once they start to smell. This doesn’t take that much time, you just have to schedule a few days for the shoes to dry.
